Tools:
Mini screw drivers
Super Glue
Heavy Duty Nail Polish Remover
Safe container
Paper towel

So here is what your key could look like.. and what the old ones look like

Start by pulling your old and new keys apart in the center. On the old key it may be a little more difficult. Don't be scared to use a little force or even one of your mini screwdrivers to help pry.

Pull the bottom half open
New one will be empty with not circuit:

Old key. Wouldn't be a bad idea to get a new battery in there as well (battery is a CR2032):

Using a flat head mini screwdriver place it under the circuit board and gently pry up. You will notice that the circuit board is placed down on two pillars of plastic. Just work your way around the key.

Place circuit into the new empty key. Keeping in mind the curve and have this facing towards the buttons.


Snap the bottom parts together.
Now the important part, top half. Here we will swap the blank key from the new keys.. with the cut original keys. The main reason for me creating this DIY is because I was unable to find any information regarding how to do this.
Start with the old top half where your worn out VW symbol is. Its a pain to try and pry off with the screwdrivers so I used a little bit of nail polish remover.


Let the nail polish remover sit for about 10mins. Long enough for a drink  Now pry the logo off with the screw driver should be much easier now.. Under the logo you will find a small philips screw. Use your mini screwdriver and take it out.

Now this is very important to do this slowly and carefully. You will begin to pull the two upper parts apart. The key is spring loaded and very easy to send pieces flying. Using your thumb and index finger hold the key in place.

Gentally place the top part with the key on your work surface and slowly release the key and spring. Remove the spring key and button


Repeat the above process for the upper half of the new key. Remove the blank and replace it with the old cut key. Replace parts including new spring and button with old cut key in new upper half.
Now with your "empty" old upper half place it in your container. To the left of the key you will look in and see something about the size of a pencil led.
This little part is VERY important. This is the transponder, the part that will cost you $50+ to get reprogrammed.

Put the part into your container, once again put some nail polish remover in and let it sit for about 10mins. Have yourself another drink 

Welcome back! Now using your slotted screwdriver gently work your way around prying up on the transponder.


Place it in the new upper half of the key

Use two drops at the top and bottom of this guy for it to stay in place.

With the spring and cut key in place of the new uncut key assemble it. The key will have to be "loaded" for it to spring out when the button is pressed.
So with the key in your had assembled as pictured. Turn the key counter clockwise twice.

Carefully put the other top part with it and screw it down.

Put your previously assembled lower half with the top and you have brand new keys! Go test them. I recommend doing one at a time to ensure you atleast have a working key encase something goes horribly wrong.


- click here - to see the full video on how to remove your Volkswagen VW Key FOB Flip Blade
--------
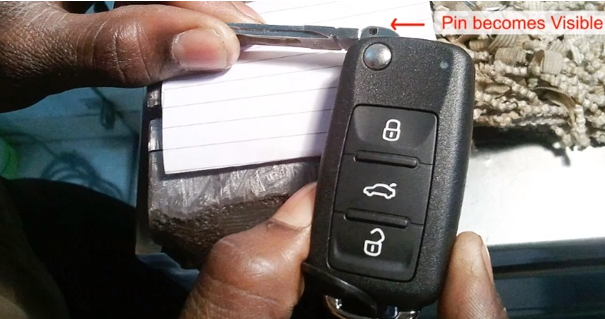
Pictured below is the pin that you will have to remove from your key, this is the only thing that is holding in your flip blade, removing this will allow you to switch a blank flip key blade with your cut key blade, this saves you money from having a locksmith cut you a new key.

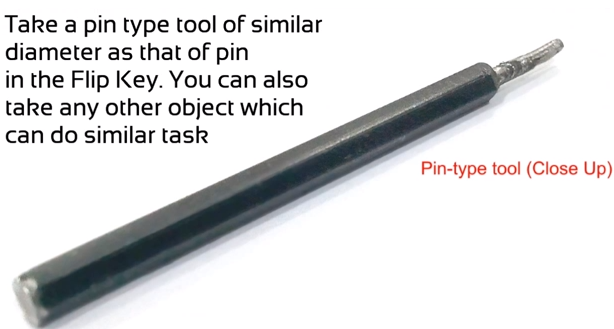
Example of the push pin you can use to remove the pin, anything that is small enough to get inside will be efficient:

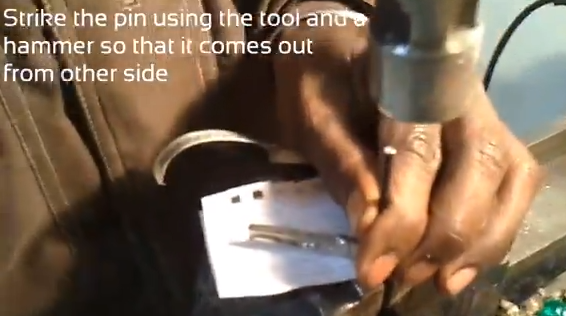
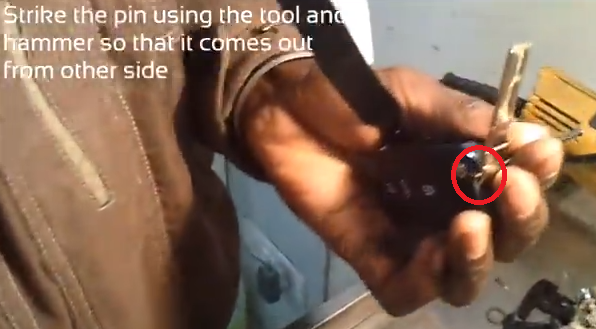
With a hammer, strike the pin, this will release the pin holding your key fob in place:

Use a pair of pliers to remove the pin, you can now use your cut blade and use a hammer to replace the pin:


